 Backup
Basic Information
Mobile Apps
FAQ
General Information
Livedrive Backup
Mobile Apps
Web Portal
Technical Help
Backup
Mobile Devices
Billing
My Account
Technical Help
Mac
Mac Users: How to Backup a NAS/Network Drive
With Livedrive Backup, Pro Suite or Business accounts, you can backup your NAS (Network Drive) devices. For home users NAS devices are additional purchases per NAS and can be purchased via your web portal.
Please note: Backups are not to be used for archiving. You must at all times hold an original copy of the data in the original location on the system it was backed up from. If you delete files from your computer that have been backed up we will remove the corresponding backup from our servers.
If you wish to only backup your NAS device, you must still install Livedrive on your local hard drive and select at least one local file for backup.
Things to remember when backing up your NAS:
- There is a limit of 5TB for any single external drive including NAS devices and USB drives.
- You must ensure that the device is attached whilst running Livedrive
How to Backup your NAS
Mapping your NAS device
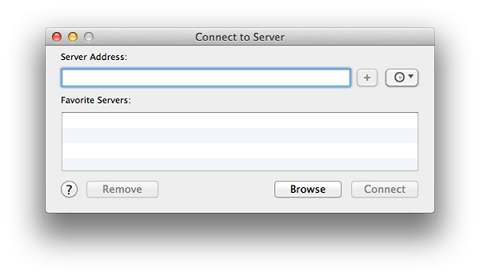
You must ensure that the device is mapped as a letter drive. To map your NAS,
- Go to Finder
- Press CMD + K on your keyboard to mount the NAS device as a volume
- Enter smb:// [your IP address] e.g. smb://123.45.6.78
- Click Connect
Selecting your NAS files for Backup
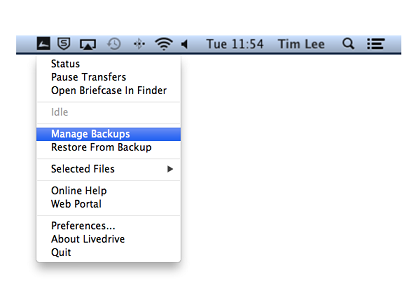
- Click on the Livedrive icon
- Select Manage Backups
- Expand Volumes and expand the NAS device
- Select the files or folders you wish to backup - do not backup from the root of the NAS device, e.g. only select folders within the NAS device
- Click Apply
That’s it! Livedrive will now start backing up your NAS device. Your web portal will display the backup as a folder within your backup set.
Mac Users: How to Backup your External USB Hard drive
With Livedrive Backup, Pro Suite or Business accounts, you can backup your external USB hard drives.
As Backup is a mirrored copy of the files/folders you select, you must ensure that the device is attached to your computer when running Livedrive.
If the device is disconnected whilst Livedrive is running, then the previously uploaded files will be marked for deletion on your web portal.
Things to Remember When Backing your External HD
- There is a limit of 5TB for any single external drive including NAS devices and USB drives
- You must ensure that the device is attached whilst running Livedrive
- Do not select the root of the external hardrive; only select files/folders within the device
- You must select at least 1 file from your local drive for backup before selecting your external HD files/folders
Please note: We do not support the backup of removable or portable media (e.g. pen drives, CDs, DVDs, flash drives, mobile devices, iPods, etc) due to the way the Operating Systems categorises the devices. Whereas external HDs are read by the OS as local hard drives and therefore these can be backed up with the Livedrive software.
Mapping your NAS device
How to Backup your External USB HD
- Ensure that the external hard drive is attached and running on your computer
- Click on the Livedrive icon
- Select Manage Backups
- Expand Volumes
- Select the files & folders within the external HD - Do not select the root of the device for backup
- Click Apply
That’s it! Livedrive will now start backing up your external HD. Your web portal will display the backup as a folder within your backup set.
![]() Mac users - how to backup your external usb hard drive.pdf (598.95 KB)
Mac users - how to backup your external usb hard drive.pdf (598.95 KB)
Configuring your Livedrive Backup Scheduled Scans
Once your initial backup is complete, you can set your Livedrive software to run schedule scans of your files and folders to checking for any changes made to the file.
Livedrive will upload modified files during the scan and save the file as another version.
The schedule scan can be set to backup once every hour (up to once every 48 hours), between certain times or real time.
To configure your Livedrive schedule scans
- Click on the Livedrive icon
- Select Manage Backups
- Click on the Settings tab
- Choose your schedule scan settings

Please note
Selecting real time scans requires the application to be closed before the scan can occur. For example, if you are working on a Word document, Livedrive won't be able to back it up until you have saved and closed the file.
Real time scan: .PST - If wish to backup your Outlook .pst file with real time scan, Livedrive won't be able to back up the .PST file until you close Outlook, and if Livedrive is backing up your .PST file then Outlook will not be able to be opened.
Livedrive is not a service but an application therefore requires you to be logged in during transfer or scanning of files.
Which Operating Systems are Supported?
 The Livedrive client is supported on multiple operating systems -
Windows
Windows XP and above
Windows Server 2003-2008
Mac
Mac OS X 10.6.8 and above
For all other operating systems (for example Linux) you can access stored files through the web portal.
How Do I Restore a Deleted Backup File?
If you delete a backed up file or folder from your computer, it can be retrieved from our servers within 30 days.
Deleted files can be restore through the restore client.
For Windows users, please click here.
For Mac users, please click here.
Removal of Livedrive Backup Sets
You can stop Livedrive from backing up individual items from your backup by deselecting the items from the Manage Backups window.
For Windows users, please click here.
For Mac users, please click here.
Removing a backup set from your web portal
The re-instatement of this capability is planned to be issued in a future release. If you wish to remove a computer, i.e. the entire backup set for a computer:
1. Rename Computer
Login to your web portal
Click on Backup
Select the backup set you wish to remove and right click the icon
Select Rename and enter DELETEME

2. Removing Connection to Livedrive Servers
Click on Account Settings
Then select Computers
Click on the Remove link on the DELETEME computer
3. Contact Our Support Team
Send our support team an email at the following email address THISEMAIL@ascentive.com to request removal of your backup set.
Please note: Steps 1 and 2 above must be completed before you contact our support team.
Backing up the same computer
If you wish to backup the SAME computer after it has been removed from your account, you are required to uninstall/reinstall the Livedrive Software.
For Windows users, click here.
For Mac users, click here.
Where Can I Download the Software? How Do I Get Updates?
The Livedrive software is available for Windows and Mac computers.
You can download the software from the web portal, either on the Home page or click on Account Settings tab, and then click on Software Download.
You can make sure you have the latest version of the software by opening the Livedrive Control Panel and choosing the Updates tab, and then clicking on the Check for Updates button or by downloading the versions from your web portal.
Linux Users
We do not have a Linux client.
Mac Users: Changing your Bandwidth Settings
To modify your Livedrive Bandwidth Settings:
- Click on the Livedrive icon
- Select Preferences
- Click on the Bandwidth tab
Please ensure you set your connection speed correctly:
Download and upload bandwidth sliders: this controls how much of your total internet connection bandwidth the software uses.
When these are on 100%, Livedrive will transfer files as quickly as possible – using all of your bandwidth if necessary. If these are reduced, e.g. to 50% then Livedrive will limit itself, never using up more than 50% of the available bandwidth and leaving plenty for other activities.
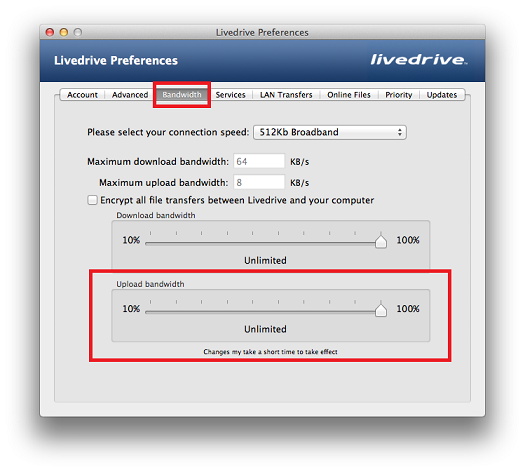
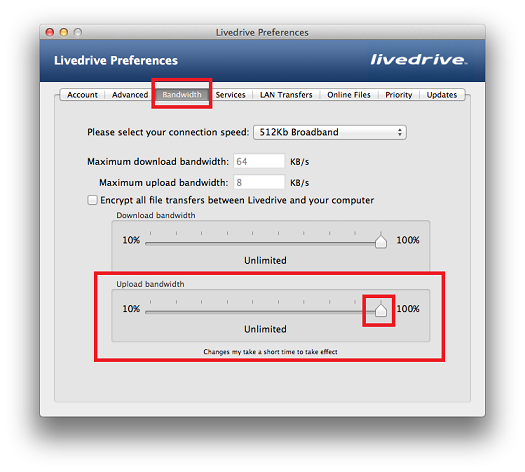
To resolve Livedrive slowing browsing speed or other internet activities please try reducing the sliders. If this doesn't remedy browsing slowness continue to decrease the sliders in further increments until you can browse satisfactorily.
Livedrive Backup - System Exclusion List (Mac)
Livedrive keeps a list of file types that should not be backed up. These include temporary, system and browser files. These files do not contain any useful information - excluding them means you only back up the things that matter to you.
Download and upload bandwidth sliders: this controls how much of your total internet connection bandwidth the software uses.
The excluded files and folders are listed below. Please note this list cannot be changed:
Mac Users: How Can I Restore My Backed Up Files?
Whether you want to restore you files on a new computer or are recovering files due a hard drive crash, the built-in restore client lets your browse your Livedrive Backup account, select any file or folder and then restore it straight to your Mac!
- Click on the Livedrive icon
- Then click on Restore From Backup
- Create a folder on your HD drive or desktop called LDR
- Within the restore client, navigate to the files/folders you wish to restore and click the Restore Folder or Restore File button
- Click Choose... and navigate to the LDR folder on your HD drive
- Click Open and then click the Restore button
Restoring deleted files or folders
You can restore deleted files and folders restore with 30 days of deletion
To view your deleted items, click on the View Deleted button.
Once enabled, simply follow the instructions above to restore your deleted files or folders.
Mac Users: How Do I Enable Encryption in the Desktop Software?
Files stored on our servers are encrypted.This storage encryption is processed by our web service on receipt of the file, rather than by the Desktop Software.
However you can enable encryption between your computer and Livedrive servers during the transfer of your data - more similar to the SSL connection you use when sending data to and from your online bank.
To enable encryption in the desktop software:
- Click on the Livedrive icon
- Select Preferences
- Click on the Bandwidth tab
- Enable Encrypt all file transfers between Livedrive and your computer
Livedrive Cannot Connect to Server
The Livedrive software uses ports 50234 and 50235, and our servers have an IP address of 82.129.64.250.
You must ensure that any firewall is configured accordingly.
If your network has a proxy server for all internet traffic you can enter the relevant information within the advanced tab of the Livedrive control panel.
You can always access your files via the web portal without installing the desktop software.
Having Connection Problems?
If the software is having trouble connecting to Livedrive, we would advise you to check the following:
Telnet
It could be that an application or hardware firewall is blocking Livedrive's connection to the servers. To test if there is a connection available,
Open up a Telnet session
- Click on Start
- Then Applications and click Command Prompt
- Type telnet app.livedrive.com 443
- Press the [Enter] key
- Disable 'SSL' via Livedrive icon > Settings (Windows) or Preferences (Mac) > Bandwidth.
- Type telnet app.livedrive.com 50234
Windows Users
For XP, telnet is automatically available
For Vista and 7, click on Start, then go to Control Panel and select Programs And Features. Then select Turn Windows features on or off and then enable Telnet Client
For Windows 8, go to the Start menu, search Control Panel and select Programs And Features. Then select Turn Windows features on or off and then enable Telnet Client
Mac Users
Click on Finder, then Utilities and select Terminal and type the telnet connection above
Results of Test
Fail - If the Telnet test returns with an error similar to cannot connect to host, then it is a software (an application) or hardware firewall issue that you will need to resolve.
Pass - If it connects (and simply displays the command prompt with a cursor ready for the next command), then please try creating a new profile.
Creating a new profile
In some cases an application or program may be restricting Livedrive's connection to the servers from your computer. If the above has been tried and tested with no avail, please try creating a new profile with administrator rights to see whether Livedrive will connect.
Once created please install Livedrive and follow the installation process.
To create a new user profile:
Windows XP
Windows 7 & Vista
Windows 8
Mac
If Livedrive connects successfully, the issue lies within the profile and we would advise you to use the newly created profile.
Still Having Connection Problems?
If you still are having connection issues after checking your firewall settings AND creating a new user profile, please submit a ticket to our support team.
Understanding the Livedrive Control Panel
The Livedrive Control Panel is used for the configuration of Livedrive Backup and Briefcase settings.
The panel can be found within your Livedrive desktop software.
For Windows Users
- Click on the Livedrive icon
- Select Settings
For Mac Users
- Click on the Livedrive icon
- Select Preferences
Attachments
![]() Windows users - understanding the livedrive control panel.pdf (1.06 MB)
Windows users - understanding the livedrive control panel.pdf (1.06 MB)
![]() Mac users - understanding the livedrive control panel.pdf (1.45 MB)
Mac users - understanding the livedrive control panel.pdf (1.45 MB)
Can I Run Livedrive on a Server?
 Backup of servers Livedrive can be used to backup your data files on server. Livedrive is compatible with:
- Windows Server 2003-2008
- Mac 10.6.8 and above
Please note: Livedrive is not a service but an application, and requires a user to be logged into the server whilst Livedrive is running.
My File icon Has a Red Arrow – Why?
Files in the web portal marked with an arrow on a red background indicate that the file(s) are not fully uploaded and can therefore not be viewed online, shared or downloaded until they have completed.
You can view the queue of pending uploads at any time via your Status Window.
If there are no pending uploads then you may wish to run an integrity check to ensure the status of your Livedrive is correct.
Please note that the time it takes to upload a file is dependent on the upload speed of your connection - we do not throttle your bandwidth in any way.
Please review our article on connection speed here.

Mac Users: How Do I Force a Backup Scan to Start Manually?
You can however force a scan of your files as follows:
- Click on the Livedrive icon
- Select Status
- Click on Scan Now under the Backup section or click on Detailed Status and press on the Scan Now button
Livedrive will then scan all your backed up files for any changes. Any changes detected during the scan will be uploaded and saved as another version of the file in your web portal.

Understanding the Livedrive Status Window
You can check the status of your files through the status window your Livedrive software.
- Click on the Livedrive icon, then click on Status
- Then click on the Detailed Status button
The Upload queue represents the number of files currently queued or uploading to our data servers.
The Download queue represents the number of files that Livedrive is currently downloading from the data centre to your local computer cache. If you don't want to store files locally, you can change the settings in the Livedrive Control Panel on the Online Files tab to not 'Just store files online...'.
How to Check Uploaded Files
The easiest way to check which files have been uploaded successfully to your Livedrive Cloud is to login to your web portal.
Checking Uploaded Files
- Login to your web portal
- Click on Backup or Briefcase tab (...and for Business Users Team Folders)
Successfully uploaded files will be in full colour.
If the file has not yet been uploaded, the file icon will be greyed out with an arrow in the top left corner. The file maybe still in your transfer queue waiting to be uploaded.
For more information on your Status Window, click here
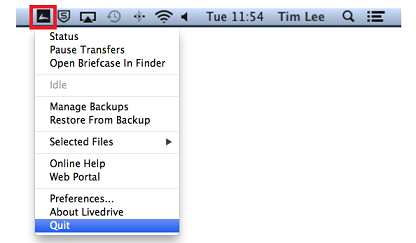
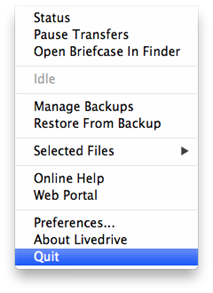
Mac Users: How Can I Stop the Livedrive Software?
You can stop the Livedrive client from within the Livedrive menu option.
Simply, click on the Livedrive icon, the select Quit.
To start Livedrive again,
- Go to Finder
- Select Applications
- Find Livedrive and double click the icon to launch the application.
Please note that if you wish to stop Livedrive as it is affecting your internet connection you may wish to simply change the Bandwidth used instead.
Mac Users: How to Edit Your Backup File / Folder Selection
You can amend your backup selection after your initial backup is complete.
To add a file or folder to the backup selection:
Please note: only select raw data files (documents, videos, music, etc). Do not select your entire user folder or applications, downloads, library, etc.
Method 1
- Click on the Livedrive icon
- Select Manage Backups
- Expand your Users folder
- Find your username
- Select the file or folder you wish to add to backup
- Click OK
Method 2
- Select the folder you wish to backup
- Click on the Livedrive icon
- Then click on Selected Files
- Then select Backup This Folder...
To review or modify the list of files or folders you backup, simply open the Livedrive Manage Backups window.
Any files removed from your backup selection will be marked as deleted online, and will be held for for 30 days before being permanently removed from our servers.
Mac Users: How to Uninstall Livedrive
You may need to uninstall/reinstall Livedrive if you experience any technical issues when using the Livedrive desktop client software. Once you have done uninstalled Livedrive, you can download and install the latest version of the software via your web portal.
Before performing this process please ensure that any files selected for upload to your Briefcase (if applicable) have completed fully or that you have a local copy as this process will clear the Livedrive cache and remove any partially upload files.
Before Uninstalling
- Click on the Livedrive icon
- Then select Quit
If necessary: go to Finder and then select Applications, Utilities and then click on Activity Monitor. Select LivedriveCore and click Quit Process to stop Livedrive running.
Uninstall Livedrive
Once Livedrive has stopped running, please download the uninstaller.
Delete Keychain References
To delete your keychain references, please:
- Click on Finder
- Then Applications and Utilities
- Click on select Keychain Access
- Select Livedrive and then click on File, Delete Keychain "login" and select Delete
Mac Users: Manage Users - Switching between Livedrive Accounts
Got multiple Livedrive accounts? With Livedrive you can add, switch and remove between your Livedrive accounts.
For use: version 1.13.2 and below
Add a User
Please note: Adding a new user will create a new backup of the computer within the web portal of the additional account.
Switching between User Accounts
- Click on the Livedrive icon
- Select Preferences
- Click on Manage Users
- Select the username you wish to switch to, and click Switch User
Please note: Changes made to files when using one user account will not affect other accounts.
Remove a User
No longer require access to user account? You can remove the user account from the list
- Click on the Livedrive icon
- Select Preferences
- Click on Manage Users
- Select the username you wish to remove , and click the '-' button
Please note: removal of a user in this manner does not cancel/delete/close your Livedrive account.
Mac Users: Establishing a Connection for Selecting NAS Files
 Having problems when backing your NAS device? Files not enabled for backup?
When connecting to a server the Mac OS default to backup your NAS is AFP (Apple Filling Protocol).
However when backing up a NAS with Livedrive, we use SMB (Server Message Block) to establish a connection.
For more information on how to backup your NAS, click here.