 Backup
Basic Information
Mobile Apps
FAQ
General Information
Livedrive Backup
Mobile Apps
Web Portal
Technical Help
Backup
Mobile Devices
Billing
My Account
Getting Started Guide
Web Portal
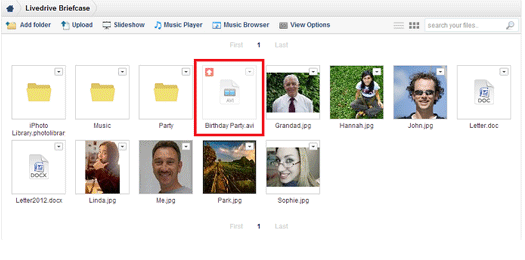
My File icon Has a Red Arrow - Why?
Files in the web portal marked with an arrow on a red background indicate that the file(s) are not fully uploaded and can therefore not be viewed online, shared or downloaded until they have completed.

You can view the queue of pending uploads at any time via your Status Window.
Please review our article on connection speed here.
How to Check Uploaded Files
The easiest way to check which files have been uploaded successfully to your Livedrive Cloud is to login to your web portal.
Checking Uploaded Files
- Login to your web portal
- Click on Backup or Briefcase tab (...and for Business Users Team Folders)
Successfully uploaded files will be in full colour.
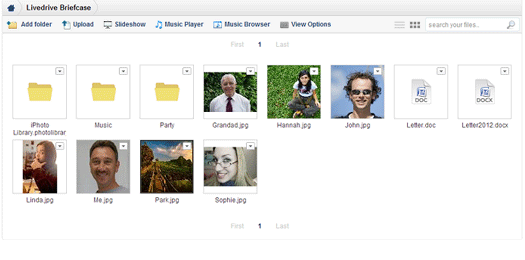
If the file has not yet been uploaded, the file icon will be greyed out with an arrow in the top left corner. The file maybe still in your transfer queue waiting to be uploaded.
For more information on your Status Window, click here
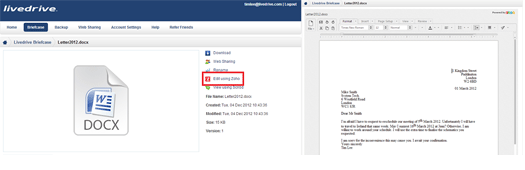
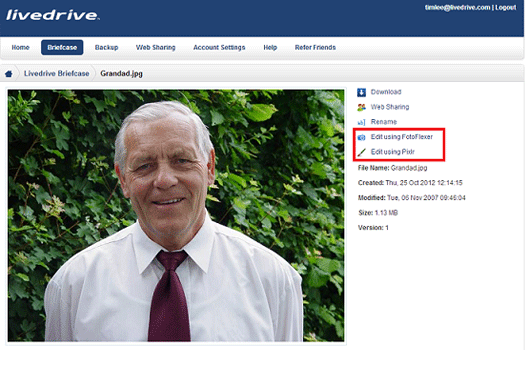
How to View or Edit Documents Through the Web Portal
You can view supported documents from the Backup or Briefcase, however you can only edit documents in the Livedrive Briefcase.
Livedrive uses various 3rd party applications to allow you to view and edit your documents.
Please be aware that these applications are only for updating existing documents and you cannot save a file with a new name.
For Text and Office documents:
Zoho - edit/view text and Office documents. Please note that it isn't possible to modify Excel or PowerPoint 2010 documents, i.e. .xlsx or .pptx
The following are supported by Zoho: .doc,.docx,.html,.sxw,.odt,.rtf,.xls,.xlsx,.ods,.sxc,.csv,.tsv,.ppt,.pps,.odp,.sxi.
How to edit documents:
- Login to your web portal
- Click on Briefcase
- Navigate to the file, and double click to open
- Click on Edit with Zoho
- Edit your document!
Once edited, click File and Save. A new version of the document will be created in your web portal.
You can also revert back to your previous changes

For Image files:
FotoFlexer - view and edit your images
Pixlr - view and edit your images
How to edit pictures:
How to edit documents:
- Login to your web portal
- Click on Briefcase
- Navigate to the file, and double click to open
- Click on Edit with FotoFlexer or Pixlr
- Edit your picture!
Once edited, click File and Save or just Save. A new version of the picture will be created in your web portal.
You can also revert back to your previous changes.

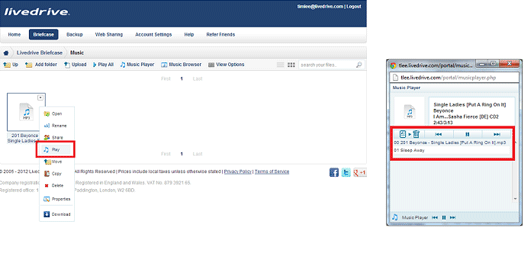
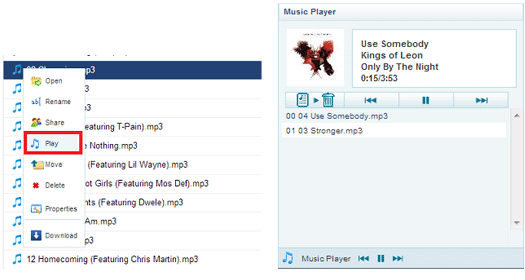
How Do I Play Music From My Web Portal?
All your MP3 files with ID3 tags version 2 will be automatically added to the Livedrive Music Browser. You can search by Artist, Album or Song Title and even create a playlist!
Click on the Briefcase tab and Music Browser to view.
Once you have found an MP3 file you want to play in your Music Browser, simply click on the music file and select play.
Please note: only .mp3 files can be streamed via the web portal or Livedrive apps.

How to play create a playlist
1. You can create a playlist by selecting individual MP3s, and click play.
Each file will be queued up within your music player
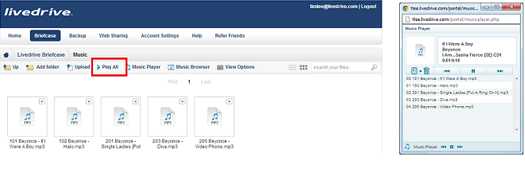
2. Navigate to a folder within your Briefcase with your MP3 files and click Play All
References: www.wikipedia.org
How to Create a Music Playlist
Your web portal allows you to create your own music playlists.
Whether you have Livedrive Backup or Briefcase..or even a Business account, you can play an entire album or create your own playlist whatever mood your in!
How to Play an Entire Music Folder
- Login to your web portal
- Click on Backup or Briefcase (...or Team Folders for Business users)
- Navigate to your music folder and open the folder
- Click Play All to play the entire folder
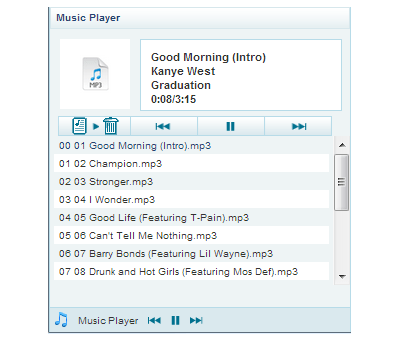
How to Create a Playlist
- Login to your web portal
- Click on Backup or Briefcase (...or Team Folders for Business users)
- Navigate to your music folder and open the folder
- Right click the file, and then select Play to add the file to your music player
- Repeat step 4 until you have added all your music files to the playlist
Please note: the music player is configured to use crossfade therefore removing all silent gaps between songs. This overlap creates a smooth transition between the two songs and enhances you listening experience!